Track
You can track shipments for any supported carrier that provides tracking information. The mechanism Parcel uses to retrieve tracking information depends upon the carrier and service. For most carriers, Parcel interfaces with the carrier's server or web-based API to retrieve tracking information. Some services, however, provide files containing the tracking information. Parcel downloads these files so they can be tracked from this page.
Setting up tracking with FedEx and UPS
To set up tracking with FedEx and UPS, you first need to set up accounts on their respective servers that are used for this function as follows:
-
For versions of the FedEx Ship Manager Server (FSMS) earlier than v. 8.4, tracking requests for FedEx shipments are routed through the FSMS and require a FedEx account on this server. For FSMS v. 8.4 and later, tracking of FedEx shipments is done using FedEx Web Services. To access tracking functionality via FedEx Web Services, you need to set up an account and obtain the required login information. For more information on this, see the following FedEx Web page: http://fedex.com/us/developer/product/solutions.html
-
Tracking UPS shipments requires UPS Online Tools. To access tracking functionality via UPS, you need to download (free) UPS Online Tools and set up the required login. For more information on this, see the following UPS Web page: http://www.ups.com/e_comm_access/toolintro?loc=en_US
After you have set up these accounts and supplied the necessary account information when configuring the carrier, Parcel accesses these respective methods to return the requested tracking information in the form of .xml files which are then used to provide tracking reports.
Tracking Methods
You can track shipments in Parcel by the following methods:
-
Using the Track menu to: - Track shipments by Status
-
Track shipments by User
-
View tracking details
-
-
Setting up a Track task with the Scheduler (for batch or "bulk" tracking by carrier and service)
By Status
To Track a Shipment By Status, do the following:
-
Click the Track menu and select Status.
-
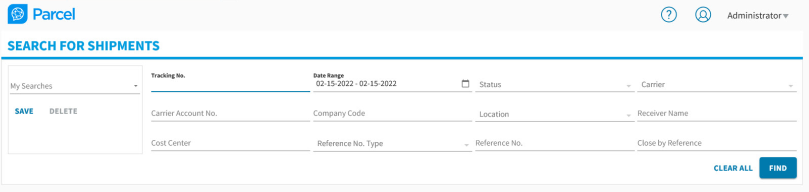
Search for the shipment you want to track by first completing the boxes at the top of the page.
Use this box...
To do this...
Tracking Number
If you know the tracking number of the shipment you want to track, type the tracking number. This is the quickest way to locate a specific shipment.
If you entered a tracking number on the Welcome page, it appears in this box automatically and is searched automatically. If the package is found, it appears in the results section on the lower part of this page.Carrier
If you want to display all of the shipments processed with a specific carrier, select that carrier from the list. You can further refine the results by completing other boxes on this page. The default carrier is established in your profile.
Location
To display shipments that were shipped from/received at a specific location within your organization, select the location from the list. The location that appears by default is established in your profile.
From Date / To Date
To display shipments that were processed or received within a specific time frame, type the date range or use the calendar to select the dates.
Reference Number / Equals
If you have a reference number for the shipment you want to track, type that number. You can select the type of reference number from the list and use the Equals box to type the number.
Where / Equals
You can define a 'where clause' to display shipments which satisfy certain criteria. In the Where list, select the data type, then type the corresponding information about the shipment you want to track in the Equals box.
For example, to search for a shipment that was shipped to a specific customer, select 'Ship To' in the Where list, then type the customer's name or customer ID in the Equals box.
In some cases, the Equals box will contain a list of values that you can select from (for example, if you selected 'Status' in the Where list, the Equals list contains all available status values). So, if you want to display shipments whose status is Late, select 'Status' in the Where list, then select 'Late' in the Equals list. -
Click SEARCH to search for shipments that match the information you entered. If no shipments that match the information can be found, a message is displayed at the top of the page. Otherwise, the matching shipments appear in the Search Results section in the lower part of the page.
Note: The number of records that appear in the first window is a setting in your profile.
- or -
Click CLEAR to clear the boxes to begin a new search.
-
In the Search Results list, locate the shipment you want to track:
You can sort the results by clicking the column labels.
If there are more results than can fit on the page, use the right arrow to view the next pages. Then use the left arrow to go back to the previous pages.
If the tracking number appears, you can click it to display more detailed information about the shipment in a separate page. -
Once you have located the shipment you want to track, view its status from the last time you tracked the shipment in the Status column. To update the status, see the next Step.
Status
Definition
Delivered
The shipment has been delivered on time successfully.
Delivered-Late
The shipment has been delivered past the original delivery date and time commitment.
Exception
The shipment was refused at delivery or it arrived damaged. Packages with this status are included in applicable search results for ten days following the expected delivery date.
Hold
The shipment is being held at a location (for example, the Post Office) for the recipient to pick it up.
In Transit
The shipment is en route to delivery.
Late
The shipment has not yet been delivered and it is now past the committed delivery date and time.
Lost
The shipment cannot be located.
Picked Up
The shipment has been picked up at the mail zone station and is en route to the mail room where it will be shipped and staged for carrier pickup.
Received
The shipment has been received in the mail room at the recipient's company.
Staged
The shipment is in the stage location ready to be picked up by the carrier for delivery to the recipient.
Voided
The shipment has been cancelled/deleted.
-
You can use the buttons at the bottom of the screen to perform different tasks on selected shipments in the Search Results list. To select a shipment in the Search Results list, select the checkbox in the far-left column for that shipment.
Note: If your role does not permission to perform a certain operation, a permission denied message will appear after you click the button.
Use this button...
To...
E-MAIL
E-Mail the details. Upon clicking E-MAIL a window opens where you can specify the email addresses to which the label, and documents (in case of international shipment) can be sent.
VOID
Void the selected shipment. You cannot void shipments after they have been closed.
EDIT
Edit the selected shipment.
CONFIRM
Not currently supported.
Confirm the selected shipment.LABEL
Print the label for the selected shipment. If the package has not shipped yet (is in picked up or staged status), the license plate prints.
BILL OF LADING
Print the Bill of Lading for LTL or TL shipments.
DOCUMENTS
View/Print the documents associated with the selected shipment if it is an international shipment.
TRACK
Track the selected shipment. This TRACK is enabled only for shipments that have been received in the Warehouse or uploaded to the carrier.
Click the tracking number hyperlink of the package to view more information.
This will update the status of the shipment if the status has changed since the last time you tracked the shipment. The status field for the package in the SOR database is updated accordingly. Any notifications configured on your system are also performed.By PIN
To Track a Shipment By PIN, do the following:
-
Click the Track menu and select By PIN.
-
Search for the shipment you want to track by first completing the boxes at the top of the page.
Use this box...
To do this...
Carrier
If you want to display all of the shipments processed with a specific carrier, select that carrier from the list. You can further refine the results by completing other boxes on this page. The default carrier is established in your profile.
Enter Tracking Number
If you know the tracking number of the shipment you want to track, type the tracking number. This is the quickest way to locate a specific shipment.
-
Click TRACK to search for shipments that match the information you entered. If no shipments that match the information can be found, a message is displayed at the top of the page. Otherwise, the matching shipments appear in the Search Results section in the lower part of the page.
Note: The number of records that appear in the first window is a setting in your profile.
- or -
Click CLEAR to clear the boxes to begin a new search. -
In the Search Results list, locate the shipment you want to track:
You can sort the results by clicking the column labels.
If there are more results than can fit on the page, use the right arrow to view the next pages. Then use the left arrow to go back to the previous pages.
If the tracking number appears, you can click it to display more detailed information about the shipment in a separate page. -
Once you have located the shipment, click SCAN STATUS to view the details of scan status of the shipment.
By Reference
To Track a Shipment By Reference, do the following:
-
Click the Track menu and select By Reference.
-
Search for the shipment you want to track by first completing the boxes at the top of the page.
Use this box...
To do this...
Carrier
If you want to display all of the shipments processed with a specific carrier, select that carrier from the list. You can further refine the results by completing other boxes on this page. The default carrier is established in your profile.
Reference Number / Equals
If you have a reference number for the shipment you want to track, type that number. You can select the type of reference number from the list and use the Equals box to type the number.
-
Click TRACK to search for shipments that match the information you entered. If no shipments that match the information can be found, a message is displayed at the top of the page. Otherwise, the matching shipments appear in the Search Results section in the lower part of the page.
Note: The number of records that appear in the first window is a setting in your profile.
- or -
Click CLEAR to clear the boxes to begin a new search. -
In the Search Results list, locate the shipment you want to track:
You can sort the results by clicking the column labels.
If there are more results than can fit on the page, use the right arrow to view the next pages. Then use the left arrow to go back to the previous pages.
If the tracking number appears, you can click it to display more detailed information about the shipment in a separate page. -
Once you have located the shipment, click SCAN STATUS to view the details of scan status of the shipment.
By User
Parcel allows you to track shipments according the the user name of the user who initiated the shipment. This tracking feature retrieves both shipments that have been sent and shipments shipped to Hold. You can track shipments initiated by up to 25 users with this functionality.
Note: You can track the status of individual shipments from the Welcome page by entering the tracking number in the Tracking Number field, and then clicking the Track.
To Track a Shipment By User, do the following:
-
From the Track menu, select By User.
This action displays the Single/Multiple User Shipment Tracking screen. -
Specify values for the fields on this screen as follows:
For the field...
Specify the following value...
Carrier
From the drop-down list, select the carrier by which the shipment to be tracked has been shipped.
Current User Name
This field is filled in by default with the User Name of the user currently logged in and accessing the tracking function. To include this user in the Tracking Report, activate the check box next to this field. (This check box is activated by default.) To not include this user in the Tracking Report, deactivate the check box.
User Name
Type in the User Names of users (shipment initiators) whose shipments you want to track. Type one User Name per line up to a total of 25 users.
Caution: If your Parcel system uses a database other than MySQL or MS SQL, you must type each user name exactly as it is entered when the user logs in to Parcel, using both lowercase and uppercase letters as appropriate. It is recommended that you follow this procedure for all databases.From Date
Type in a From Date in the form mm/dd/yyyy or click the Calendar icon to select a From Date.
To Date
Type in a To Date in the form mm/dd/yyyy or click the Calendar icon to select a To Date.
-
Click TRACK to display the Tracking Report or click CLEAR to clear the fields on the screen.
If there are shipments that meet the criteria you entered, Parcel displays a Tracking Details screen with a list of shipments.
Advanced Tracking
Advanced Tracking enables you to track for shipments/packages, which are shipped in Parcel or an External System with multiple search parameters. It also provides facility to download tracking data of packages in CSV file.
By clicking on Advanced Tracking menu in Parcel, the users are navigated to Parcel Track & Trace Application, as shown in following illustration.
Note: If user has given permission for 'Track by Status' and 'Track by Reference', then user will be able to see Advanced Tracking module under Track menu in Parcel Application.
Viewing Tracking Details
After you track a shipment on the Track screen, the application attempts to retrieve updated information about the shipment's
status
in the form of a list sorted by Tracking Number. You can click the Tracking Number hyperlink for the package to view detailed package and tracking information for that shipment. Activate the check box next to the Tracking Number to activate the buttons along the bottom of the screen to perform additional functions.
The Shipment Details screen contains details such as Tracking Number, Carrier, Service, Company Name, Delivery Date, Ship From Information, Ship To Information, Shipment Type, and Status.
Use the buttons at the bottom of the Shipment Details screen as follows:
|
Click this button... |
To... |
|
|
Email labels and documents to the returnee in case of return shipments. A pop window appears where you can choose the email addresses to whom an Email needs to be send. You can choose to send either of the following in the Email notification:
|
|
CLOSE |
Close the shipment. |
|
|
Print Shipment Details. |
|
TRACK |
Track the shipment again. |
|
VOID |
Void the shipment. You cannot void shipments after they have been closed. You can void only those shipments that you processed. |
|
CONFIRM |
Confirm the shipment if it is a Trans-border Distribution shipment. |
|
LABEL |
View the shipping label in a new browser window. |
|
BILL OF LADING |
View the Bill of Lading for LTL or TL shipments. |
Note: The buttons that are enabled (not grayed out) depend upon your role's permissions as assigned by your application administrator.
Package Status
The status of a package changes during the shipment process. The following are some valid status values as they appear in the ui_status field of the Packages table in the SOR.
|
Status |
Description |
|
ATTM |
Attempted. An attempt was made to deliver the package to the recipient but the recipient was not available to sign for the package, so the package was not left. |
|
CLOS |
Closed. The carrier with which the package was shipped has been closed in Parcel and an electronic upload file has been created as required by the carrier. |
|
CSHP |
Confirmed. The package has been confirmed on the carrier's server. This is the final step before closing the shipment with the carrier. |
|
DELV |
Delivered. The package has been successfully delivered on time. |
|
LATE |
Late. The package has not yet been delivered and it is now past the committed delivery date and time. |
|
LOST |
Lost. The package cannot be accounted for. |
|
MANI |
Manifested. The package appears on a manifest. |
|
PICK |
Picked up. The package has been picked up and will be transported to the mail room for further processing. |
|
PSHP |
Pre-shipped. The package has been pre-processed. |
|
RECV |
Received. The package has been received in the mail room. |
|
REDI |
Redirected. The package is being redirected to another recipient. |
|
RETR |
Retry. Another attempt will be made to deliver the package. |
|
SHIP |
Shipped. The package has been shipped with the carrier. |
|
VOID |
Voided. The package has been removed from the shipment process. |