BluJay Solutions Parcel 21.1.0 - User Guide
UCM Carrier Administration - Updating Rates and Routes |
Scroll |
You can use the following screens to update values for rates, routes, and zones:
•Manage Custom Rates
•Manage Custom Routes
Managing Custom Rates
To manage custom rates...
1.In the Parcel Web Admin tool under the UCM carrier, click the Manage Custom Rates link to display the Manage Custom Rates screen:
|
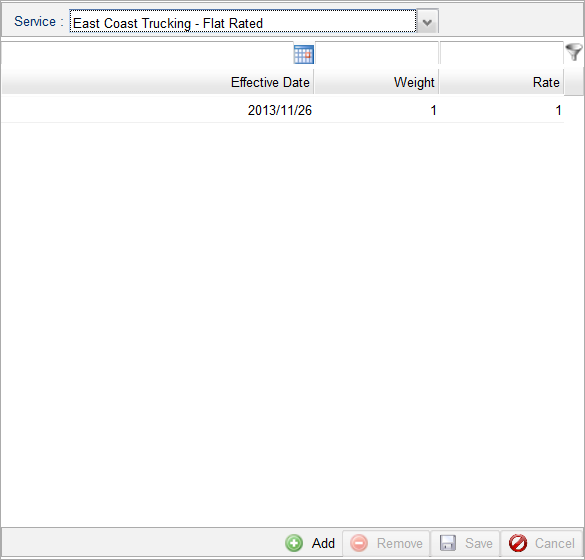
2.Under the Services bar, select a Service to manage rates for from the drop-down list. This selection displays any existing rates that were added for this service in Parcel by using this screen or importing a data file. (See the following Help topic: Importing Custom Data.)
3.Carry out the following tasks:
•To add a row of rate data, click the plus  to display a blank row. Click click the calendar
  to specify an Effective Date for the rate or enter a date in the form YYYY/MM/DD, and then enter the remaining data for the rate. (This varies according to the type of rating method. See the following Help topic: Rate File Formats.)
•To delete a row of rate data, select the row, and then click the Delete  . (Note that no confirm dialog is displayed and there is no undo for this operation.)
•To filter a list of rates, enter a filter criterion in the row with the filter  , and then click the filter
  . For example, to filter by date, enter or select the date to filter by, and then click the filter
  .
.
4.Click [Save Changes] to save your changes or click [Cancel Changes] to revert to the original values.
Managing Custom Routes
To manage custom routes...
1.In the Parcel Web Admin tool under the UCM carrier, click the Manage Custom Routes link to display the Manage Custom Routes screen:
|
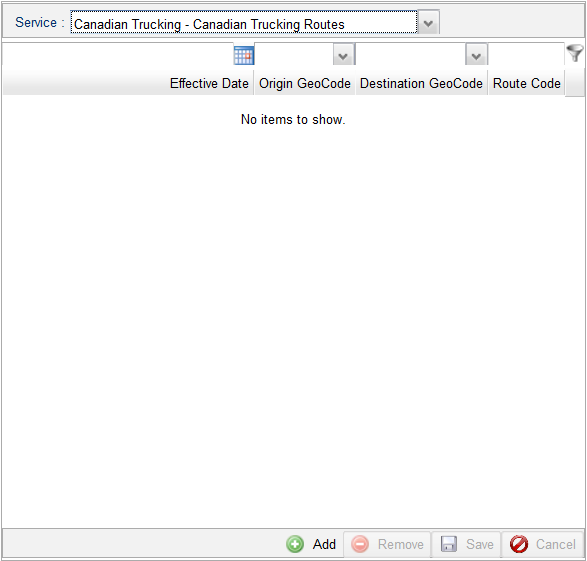
2.Under the Services bar, select a Service to manage routes for from the drop-down list. This selection displays any existing routes that were added for this service in Parcel by using this screen or importing a data file. (See the following Help topic: Importing Custom Data.)
3.Carry out the following tasks:
•To add a row of route data, click the plus  to display a blank row. Click the calendar
  to specify an Effective Date for the route or enter a date in the form YYYY/MM/DD, and then enter the remaining data for the route. (See the following Help topic: Route and Zone File Formats.)
•To delete a row of route data, select the row, and then click the Delete  . (Note that no confirm dialog is displayed and there is no undo for this operation.)
•To filter a list of routes, enter a filter criterion in the row with the filter  , and then click the filter
  . For example, to filter by date, enter or select the date to filter by, and then click the filter
  .
.
4.Click [Save Changes] to save your changes or click [Cancel Changes] to revert to the original values.